How to use the Gatekeeper Feature of SquareFeet
For example, to call an ambulance, click on the ambulance and you will see the list of all the available ambulance with addresses. Select any, and press on the call icon.
First, from SquareFeet - Apps on Google Play Download the SquareFeet mobile app.
Step-1: Open the SquareFeet app, and you will see there is a login panel. Input your phone number that is pre-registered as a gatekeeper.
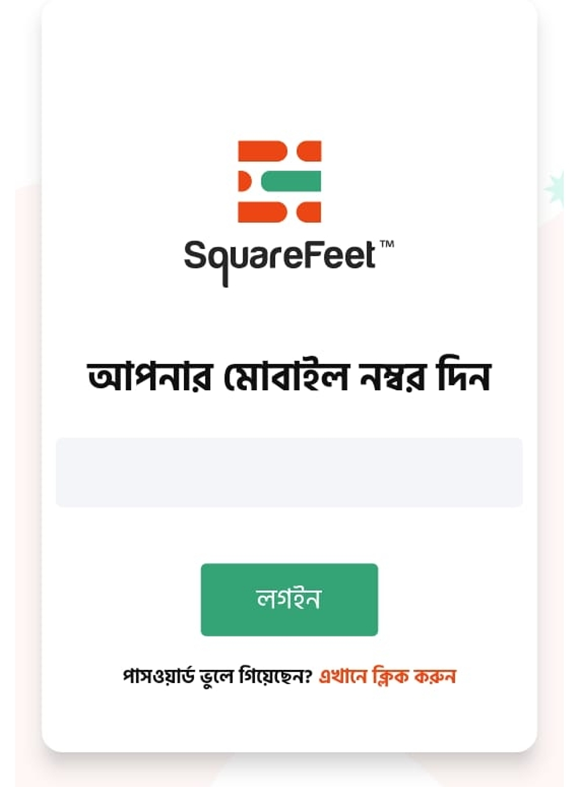

Step-2: A password box will appear, here insert your password, and click on the login button.

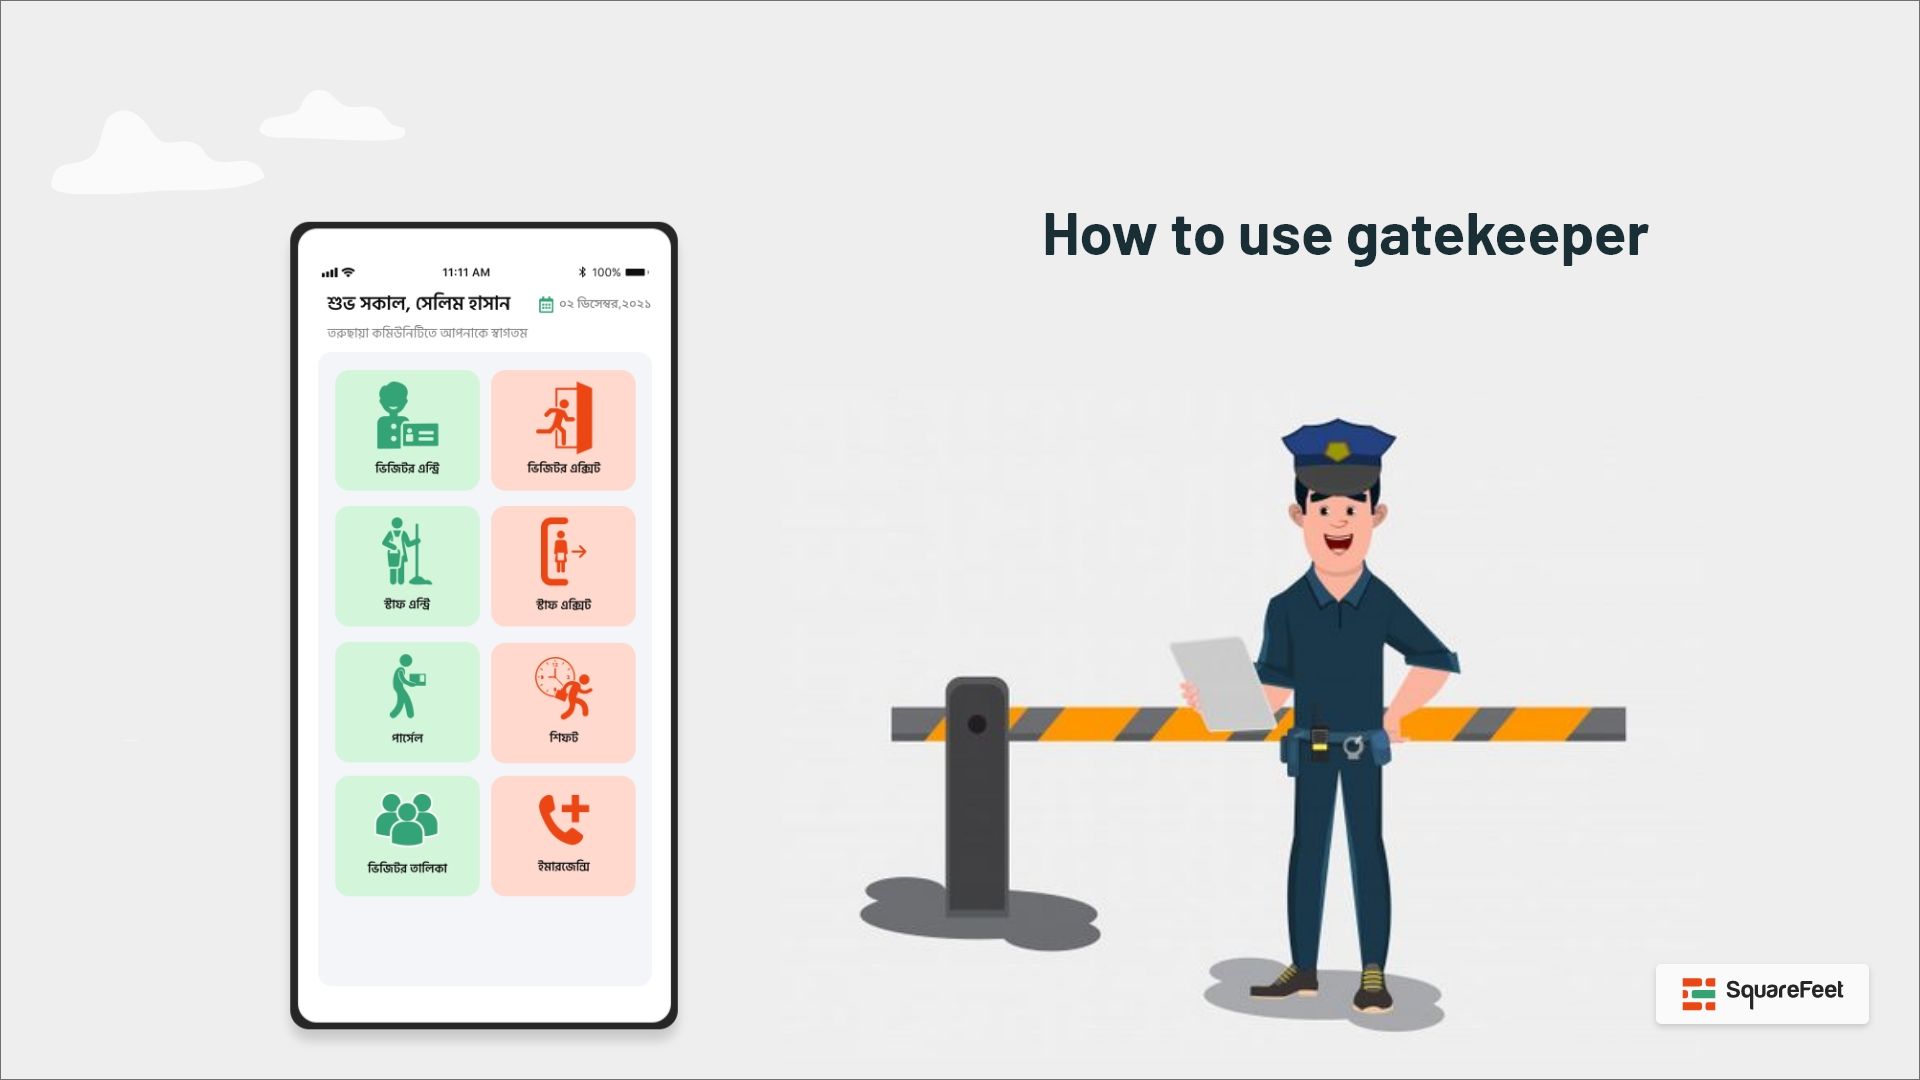
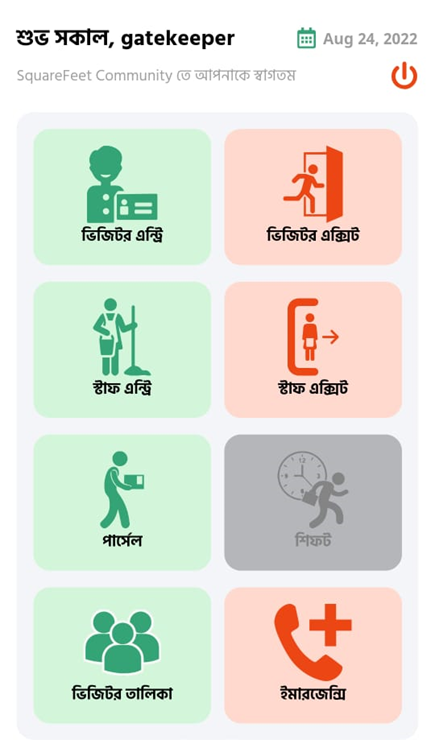
Step-3: Now, you will see the home page of the gatekeeper. Here, there are options to make a visitor’s entry, make a visitor’s exit.
Make a staff’s entry, make a staff’s exit.
Do a parcel entry, see the visitors’ list, and use the emergency services.

How to Make Entry of a Visitor
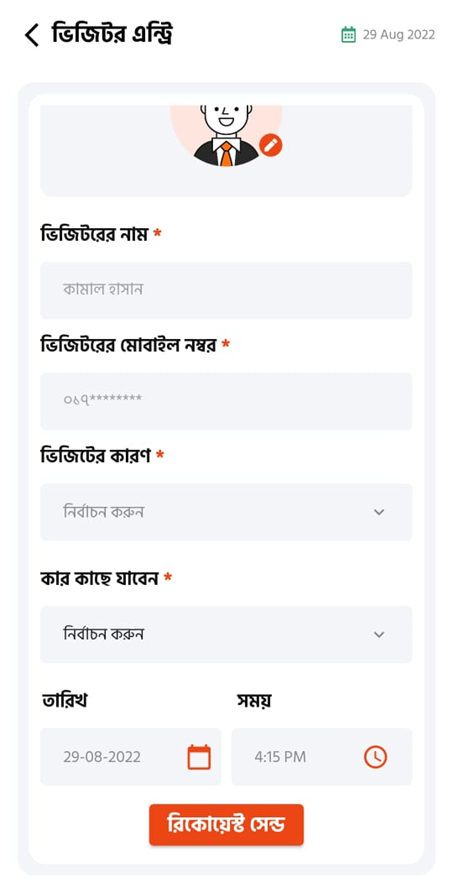
Step-1: To make the entry of a visitor, you have to enter the name of the visitor, the phone number, the reason to visit, whom to visit, and upload the picture of the visitor.
The date and time will be automatically selected.
Now press submit. A request to the concerned person will be sent. If he approves the entry of the visitor will be successfully approved.

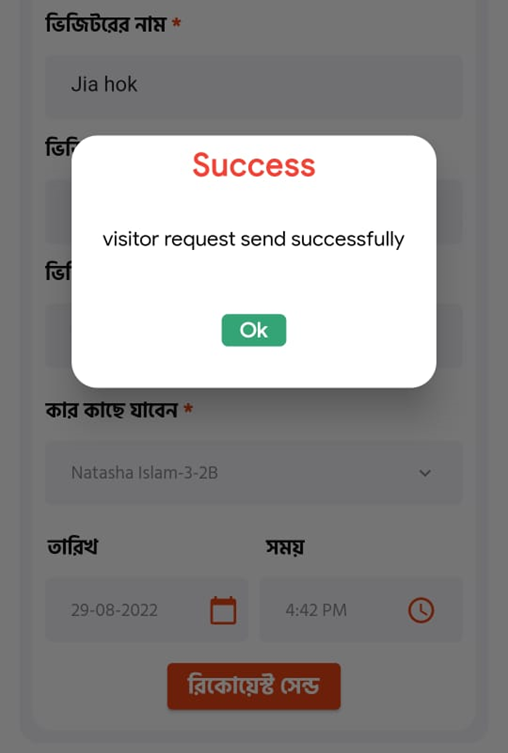
Step-2: If all the data are entered correctly, you will get a message saying “visitor request send successfully”.

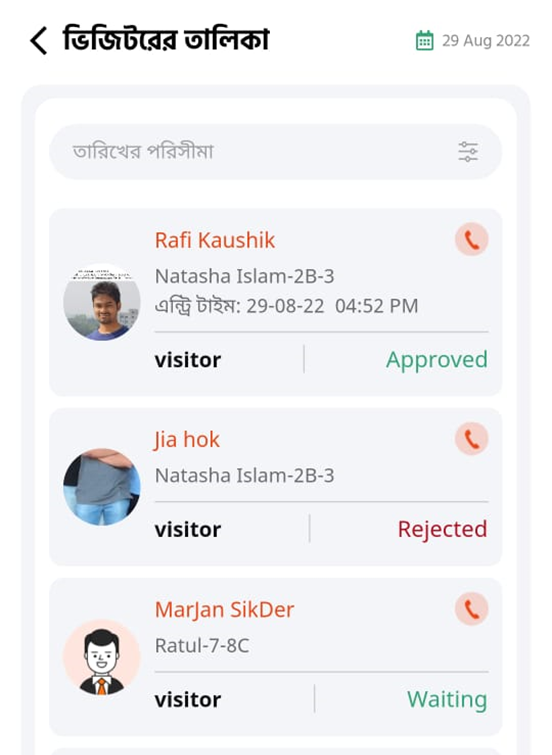
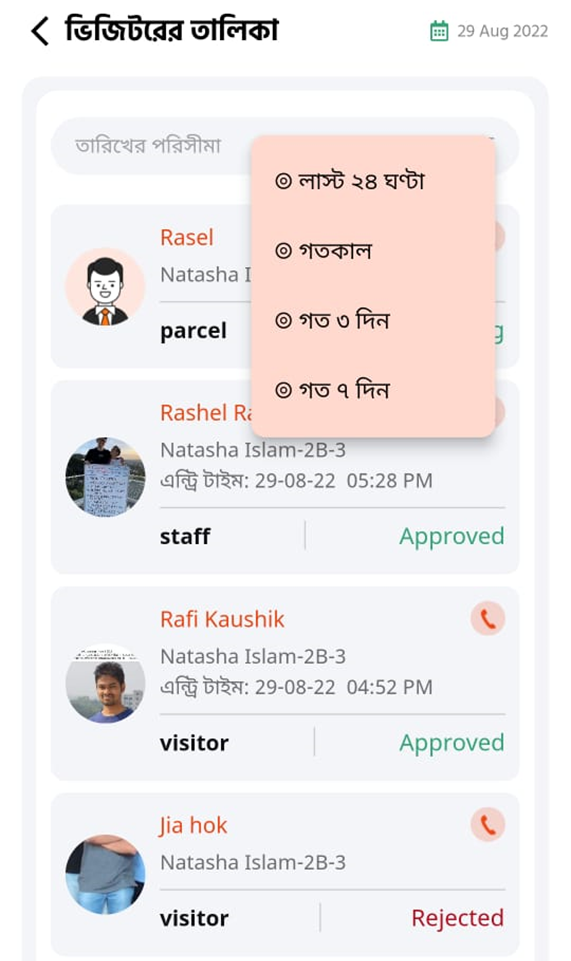
Step-3: If the concerned community member approves the visitor, the visitor list will have his entry as “Approved”. If not, it will remain as “Waiting”. If he rejects the visitor, the status will be “Rejected”.

How to Exit a Visitor
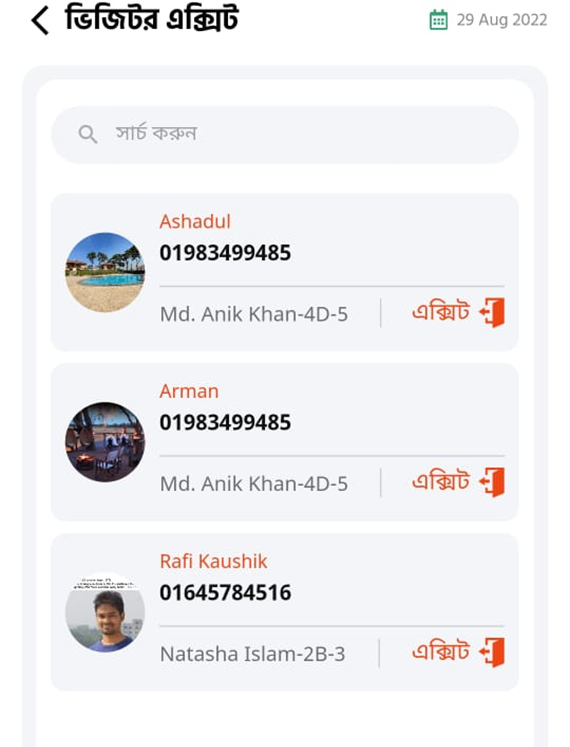
Step-4: To mark the exit of a visitor, you have to go to the exit option and click on the exit button. He will be removed from the exit page list.

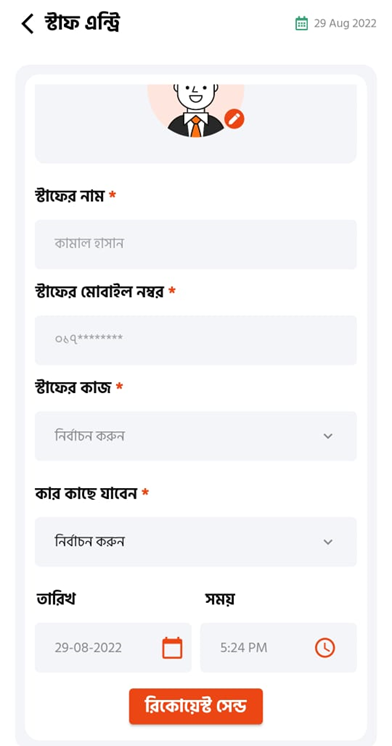
How to Make Entry of a Staff
Step-1: To make the entry of staff, you have to enter the name of the staff, upload the picture of the staff, input the phone number, the work of the staff, and whom the staff wants to visit.
The date and time will be automatically selected.
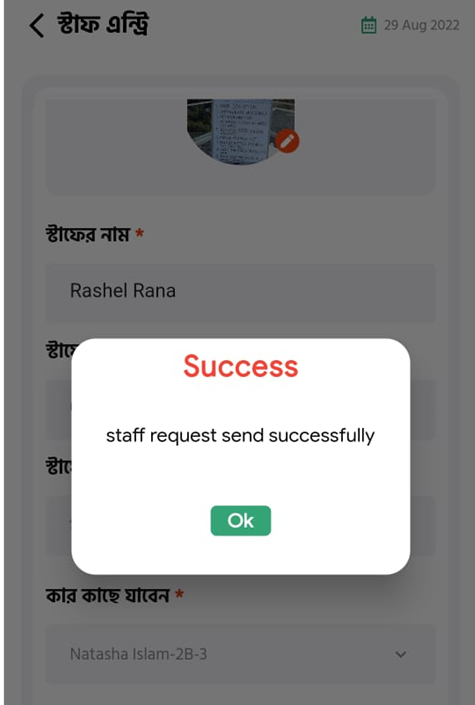
Now press submit. A request to the concerned person will be sent. If he approves the entry of the staff will be successfully approved.

Step-2: If all the information is entered correctly, you will get a message saying “request send successfully”.

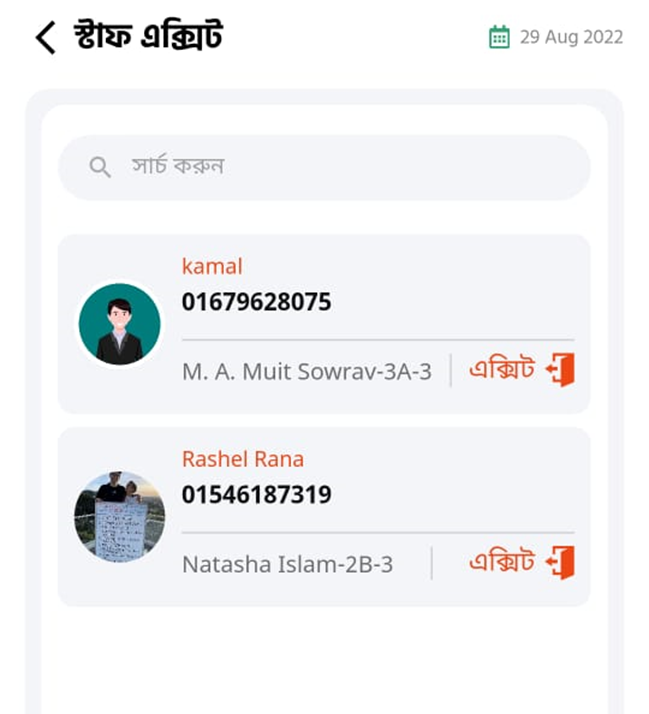
Step-3: If the concerned community member approves the staff, the visitor list will have his entry as “Approved”. If not, it will remain as “Waiting”. If he rejects the staff, the status will be “Rejected”.

How to Exit a Staff
Step-4: To mark the exit of a Staff, you have to go to the exit option and click on the exit button. He will be removed from the exit page list.

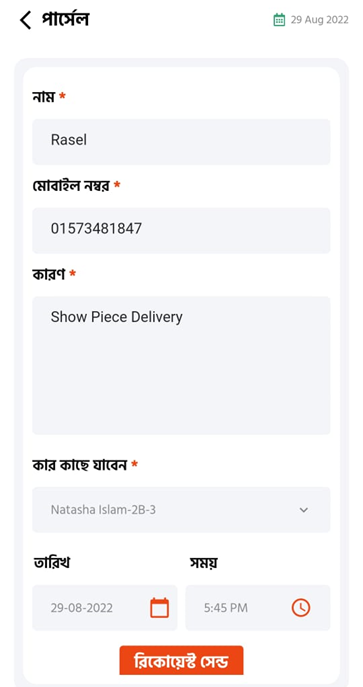
How to Make Entry of a Parcel
Step-1: To make the entry of a parcel, you have to enter the name of the visitor, the phone number, the reason, and to whom the visitor wants to deliver the parcel.
The date and time will be automatically selected.
Now press submit. A request to the concerned person will be sent. If he approves, the entry of the visitor will be successfully approved.
Step-2: If the concerned community member approves the visitor, the visitor list will have his entry as “Approved”. If not, it will remain as “Waiting”. If he rejects to receive the parcel from the visitor, the status will be “Rejected”.
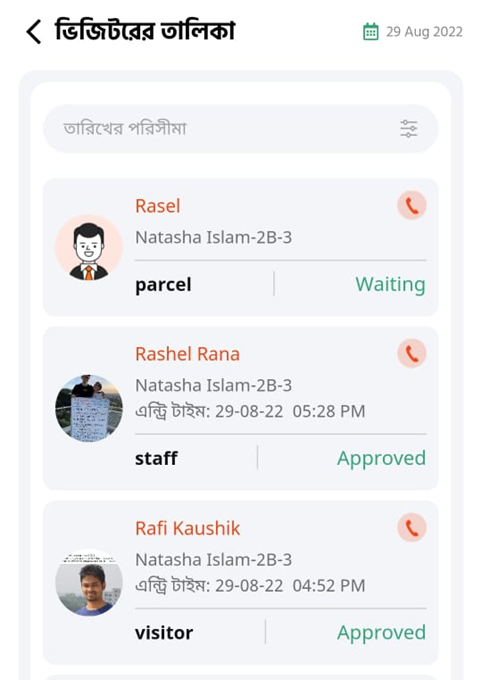

Figure: The Visitor History Page
Step-3: You can filter the visitor list for up to 7 days and see who came to visit you for what purpose.

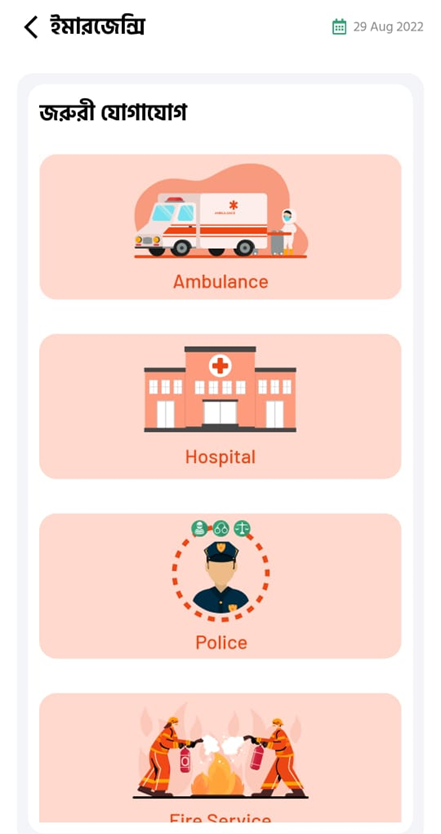
How to Use the Emergency Service
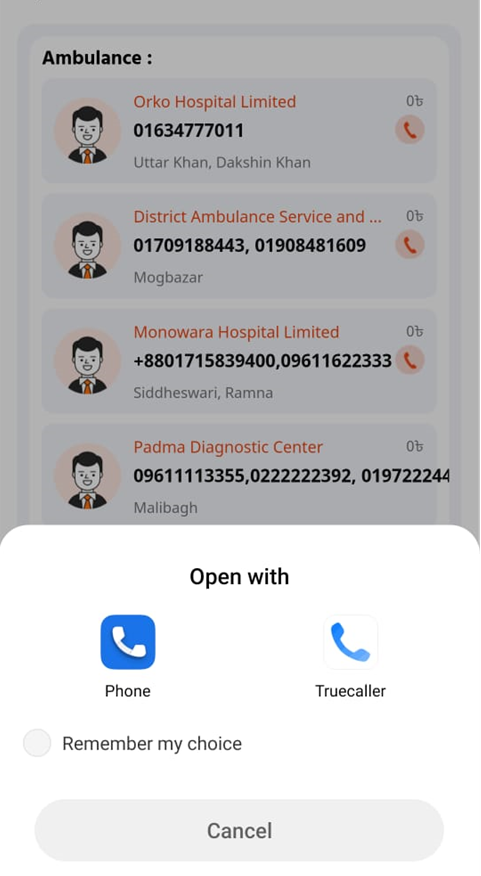
Step-1: To avail of the emergency service, you have to go to the emergency section. Here you will see Ambulance, Hospital, Police, and Fire Service. You have to select one at a time.

Step-2: For example, to call an ambulance, click on the ambulance and you will see the list of all the available ambulance with addresses. Select any, and press on the call icon.
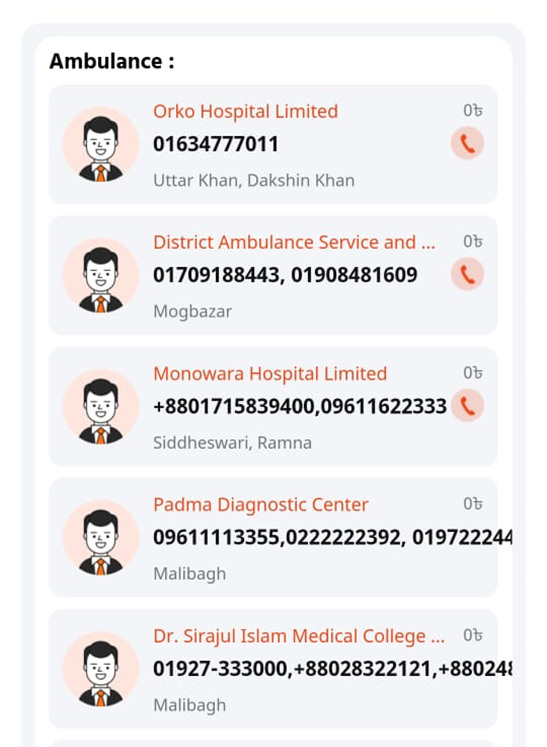

Step-3: You will be directed to the call option of your phone, with the number dialed on, that particular ambulance.